How to Pack Up Your Entire House for Storage in 3 Days
The thought of packing up your entire house can feel rather nightmarish. Even more so when you’re on a tight deadline! Getting everything packed up and ready to go in just a few days can seem impossible. However, with a methodical system in place, you can make easier work of this daunting task.
Being organised is the key to success! With proper planning, you can pack your belongings effectively for safe home storage and meet your deadline.
At Safestore Containers, we’re proud to be the storage facility Auckland residents rely on for secure, weatherproof home storage solutions. In this article, we share simple steps to simplify the process of packing up your home for storage.
Day 1: Preparation and Priority Packing
This first phase is all about creating a logical packing system and getting your home organised.
1. Create a Game Plan
A great way to start is by doing a walkthrough of your living space. While you’re doing this, jot down what needs to be packed in each room by creating a room-by-room packing ‘checklist’. When it comes time to the actual packing, this can help you stay focused and track your progress.
Next, gather your packing supplies, which may include:
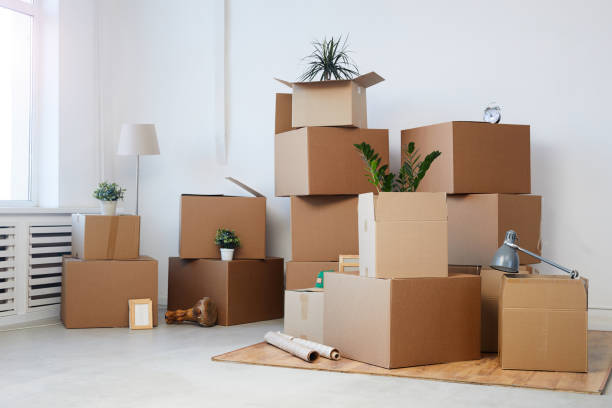
- Sturdy boxes in a range of sizes
- Packing tape
- Markers for labelling
- Bubble wrap or other soft padding for fragile items
2. Declutter Ruthlessly
Before you start putting stuff away in boxes, one of the smartest ideas is to declutter your cupboards, cabinets, and shelves. This initial home organisation effort can save you from having to pack unnecessary things and can make the packing process a lot smoother! It can also maximise space in your storage container later. When decluttering, consider using these three categories:
- Store: items you’ll keep (and pack)
- Donate: items you don’t need that are in good enough condition to re-home
- Discard: Items that you no longer need or are in poor, unusable condition
Day 2: Tackle Major Living Areas
On day two, it’s time to get stuck into the main areas of your home.
1. Room-by-Room Packing
It’s important to tackle one room at a time. A good place to start is the living room or bedroom. Pack all the little bits first, then move onto larger items like furniture. When dissembling furniture, bag and label all screws and other bits of hardware, attaching it to the corresponding furniture. This can help keep things neat and prevent lost pieces. And don’t forget to label boxes as you go to make unpacking a breeze when the time comes!
2. Protect Fragile Items
Handle fragile items with care. Use bubble wrap, towels, or clothing to protect breakables like glassware and dishes. If you’re packing plates, stacking them vertically like records can prevent cracking. Consider placing delicate belongings like jewellery and ornaments in small boxes or baskets for extra protection. It’s a good idea to label fragile boxes clearly. This way, you know to be extra careful when moving them.
1. Organise Boxes by Priority
Think ahead to when you’ll unpack. Pack your most-used items, like kitchen essentials or toiletries, into clearly marked ‘Priority’ boxes. When you put the boxes into storage, you can place these ‘Priority’ boxes close to the front of your storage container for easy access.
Day 3: Final Details and Storage Prep
Good news! You’re on the home stretch! In this phase, you’ll focus on the last bits and pieces lying around and prep your boxes for storage.
1. Pack Remaining Essentials
There’s likely to be stuff lying around the house still that you’ve been using over the past couple of days. These might include bedding, toiletries, and cleaning equipment. Do a walkthrough of your home, ensuring you gather them all.
2. Clean as You Go
As you move the packed boxes out of each room, you can sweep the floors, wipe down any surfaces, and vacuum.
3. Final Check and Inventory
It’s time for a final check! Open every drawer and cupboard, and inspect every shelf for anything that you may have forgotten.
Then, before you seal your boxes, take clear, well-lit photos of your packed items, showing their condition. Make sure you save these images somewhere you can easily access them, like in a special labelled folder on your phone or in a cloud storage account. If your items get damaged, lost or stolen at some point during the storage process, these photos will be part of the proof you’ll need to lodge an insurance claim.
4. Prepare for Home Storage
Finally, it’s time to seal up your boxes and get them ready for transportation to your chosen storage facility. Once at the storage facility, it’s important to load your storage container carefully. Place heavier boxes at the bottom and stack the lighter ones on top. Place items susceptible to moisture damage in plastic bins for extra precaution.
Reliable Home Storage in Auckland
There’s no denying that packing up your entire house for storage is a hard slog. But working off a solid plan that prioritises organisation can definitely make the process less of a headache!
Safe storage is just as important as smart packing. At Safestore Containers, we provide reliable, super secure home storage solutions in three convenient locations throughout Auckland. With a range of unit sizes and short- and long-term options, we have you covered, no matter your home storage needs.
Need help? Contact us today for expert advice, a free quote or to book your storage container.